1. Conditions for Using the Advanced Filter : To use the Advanced Filter feature, the following conditions must be met:
Create a New Report: The Advanced Filter can only be applied when creating a new report. It is not available for existing or default reports.
Select Report Type First :Users must first choose the type of report they wish to create before applying any advanced filter criteria.
Save for Future Use : Once configured, the Advanced Filter setup can be saved, allowing users to reuse the filter settings for future reports.
Here is the procedure of using an advance filter:
Pick Your Data: select the information (properties) you want to see in your report and click "build Report."


2. See Your Data (Preview): You will see a preview of your report with all the data. The button to configure properties is located at the top right as seen below

Proceed to choose your Filter Type: Click on "Configure Properties." This will let you choose what kind of filters you want in your report. Click the "Filter By" option and select it


3. Turn On Advanced Filtering: After selecting "Filter By," Two options will appear being "the basic filter options and Advanced Filter." Turn the "Advanced Filter" ON and then click "Done

4.Filter Your Report: The filter feature can be seen on the preview page. Please Click on it.

5. A window will pop up with tabs" Advanced Filter" to use more complex filtering rules.
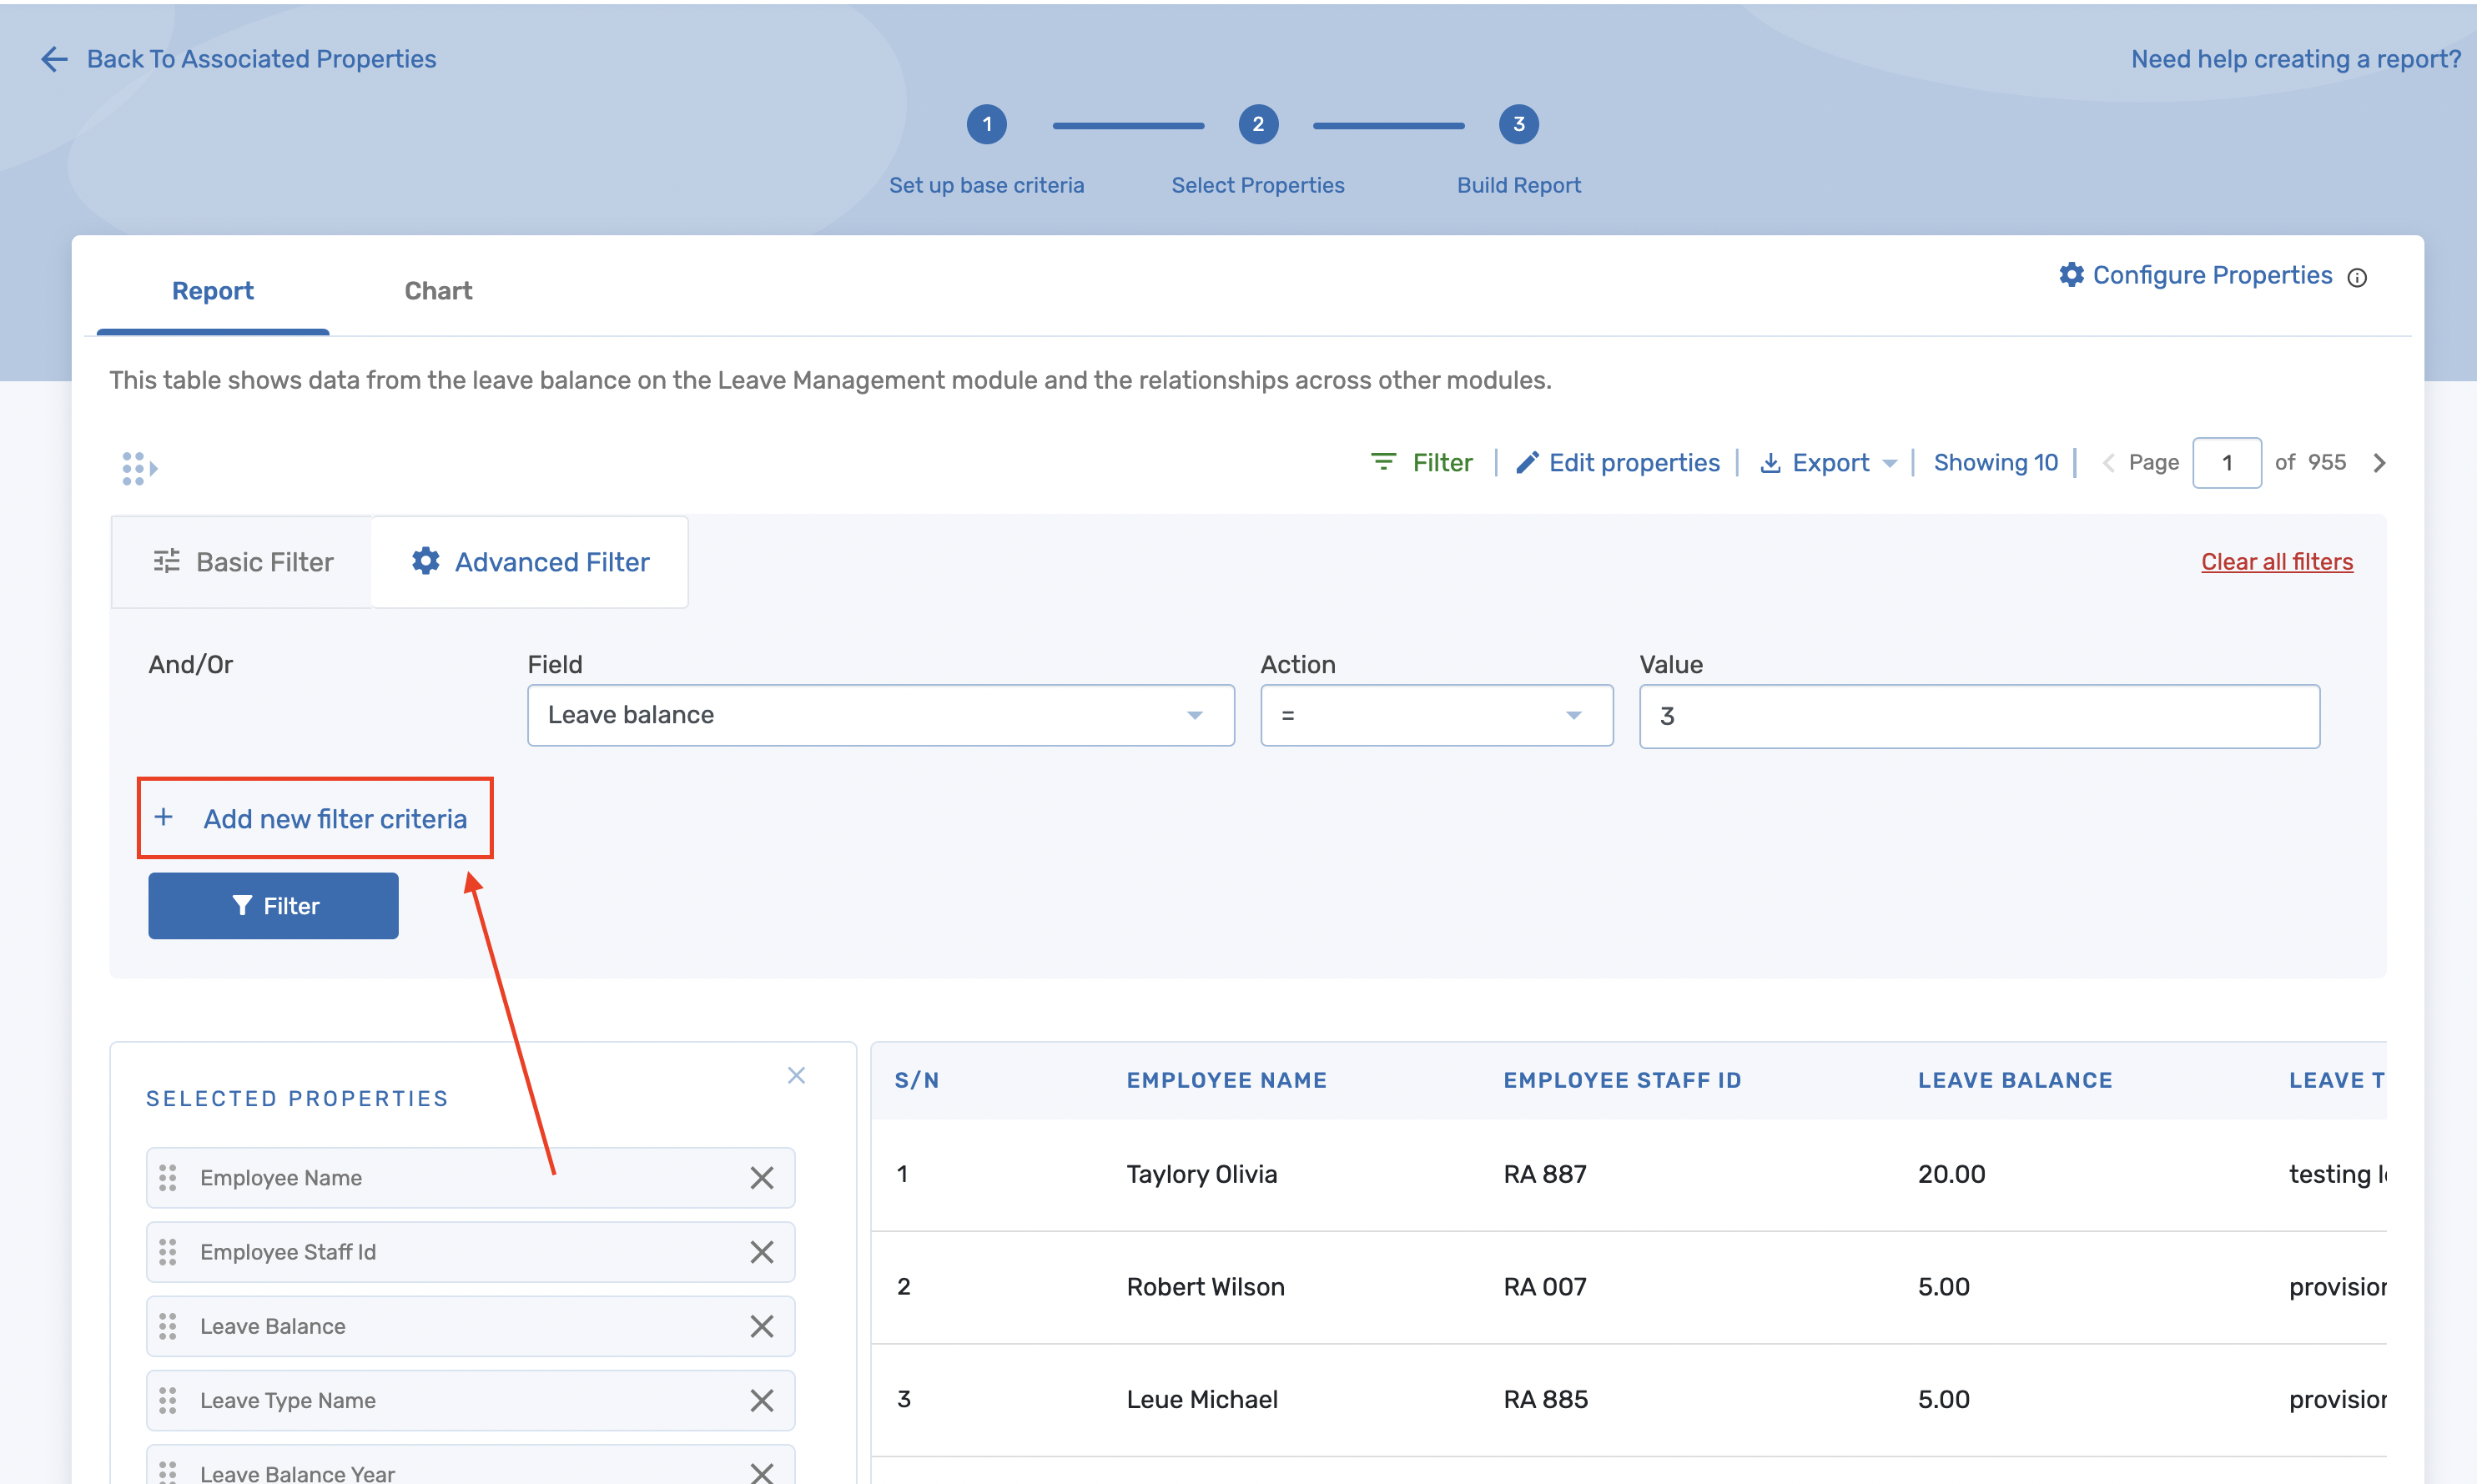
6.Start Filtering with Advanced Options: You are now on the "Advanced Filter" tab, where you can start setting up more detailed filtering rules.
7.When setting up an Advanced Filter, you are required to define three essential elements: Field, Action, and Value. These components work together to help you refine and customize the data displayed in your report.


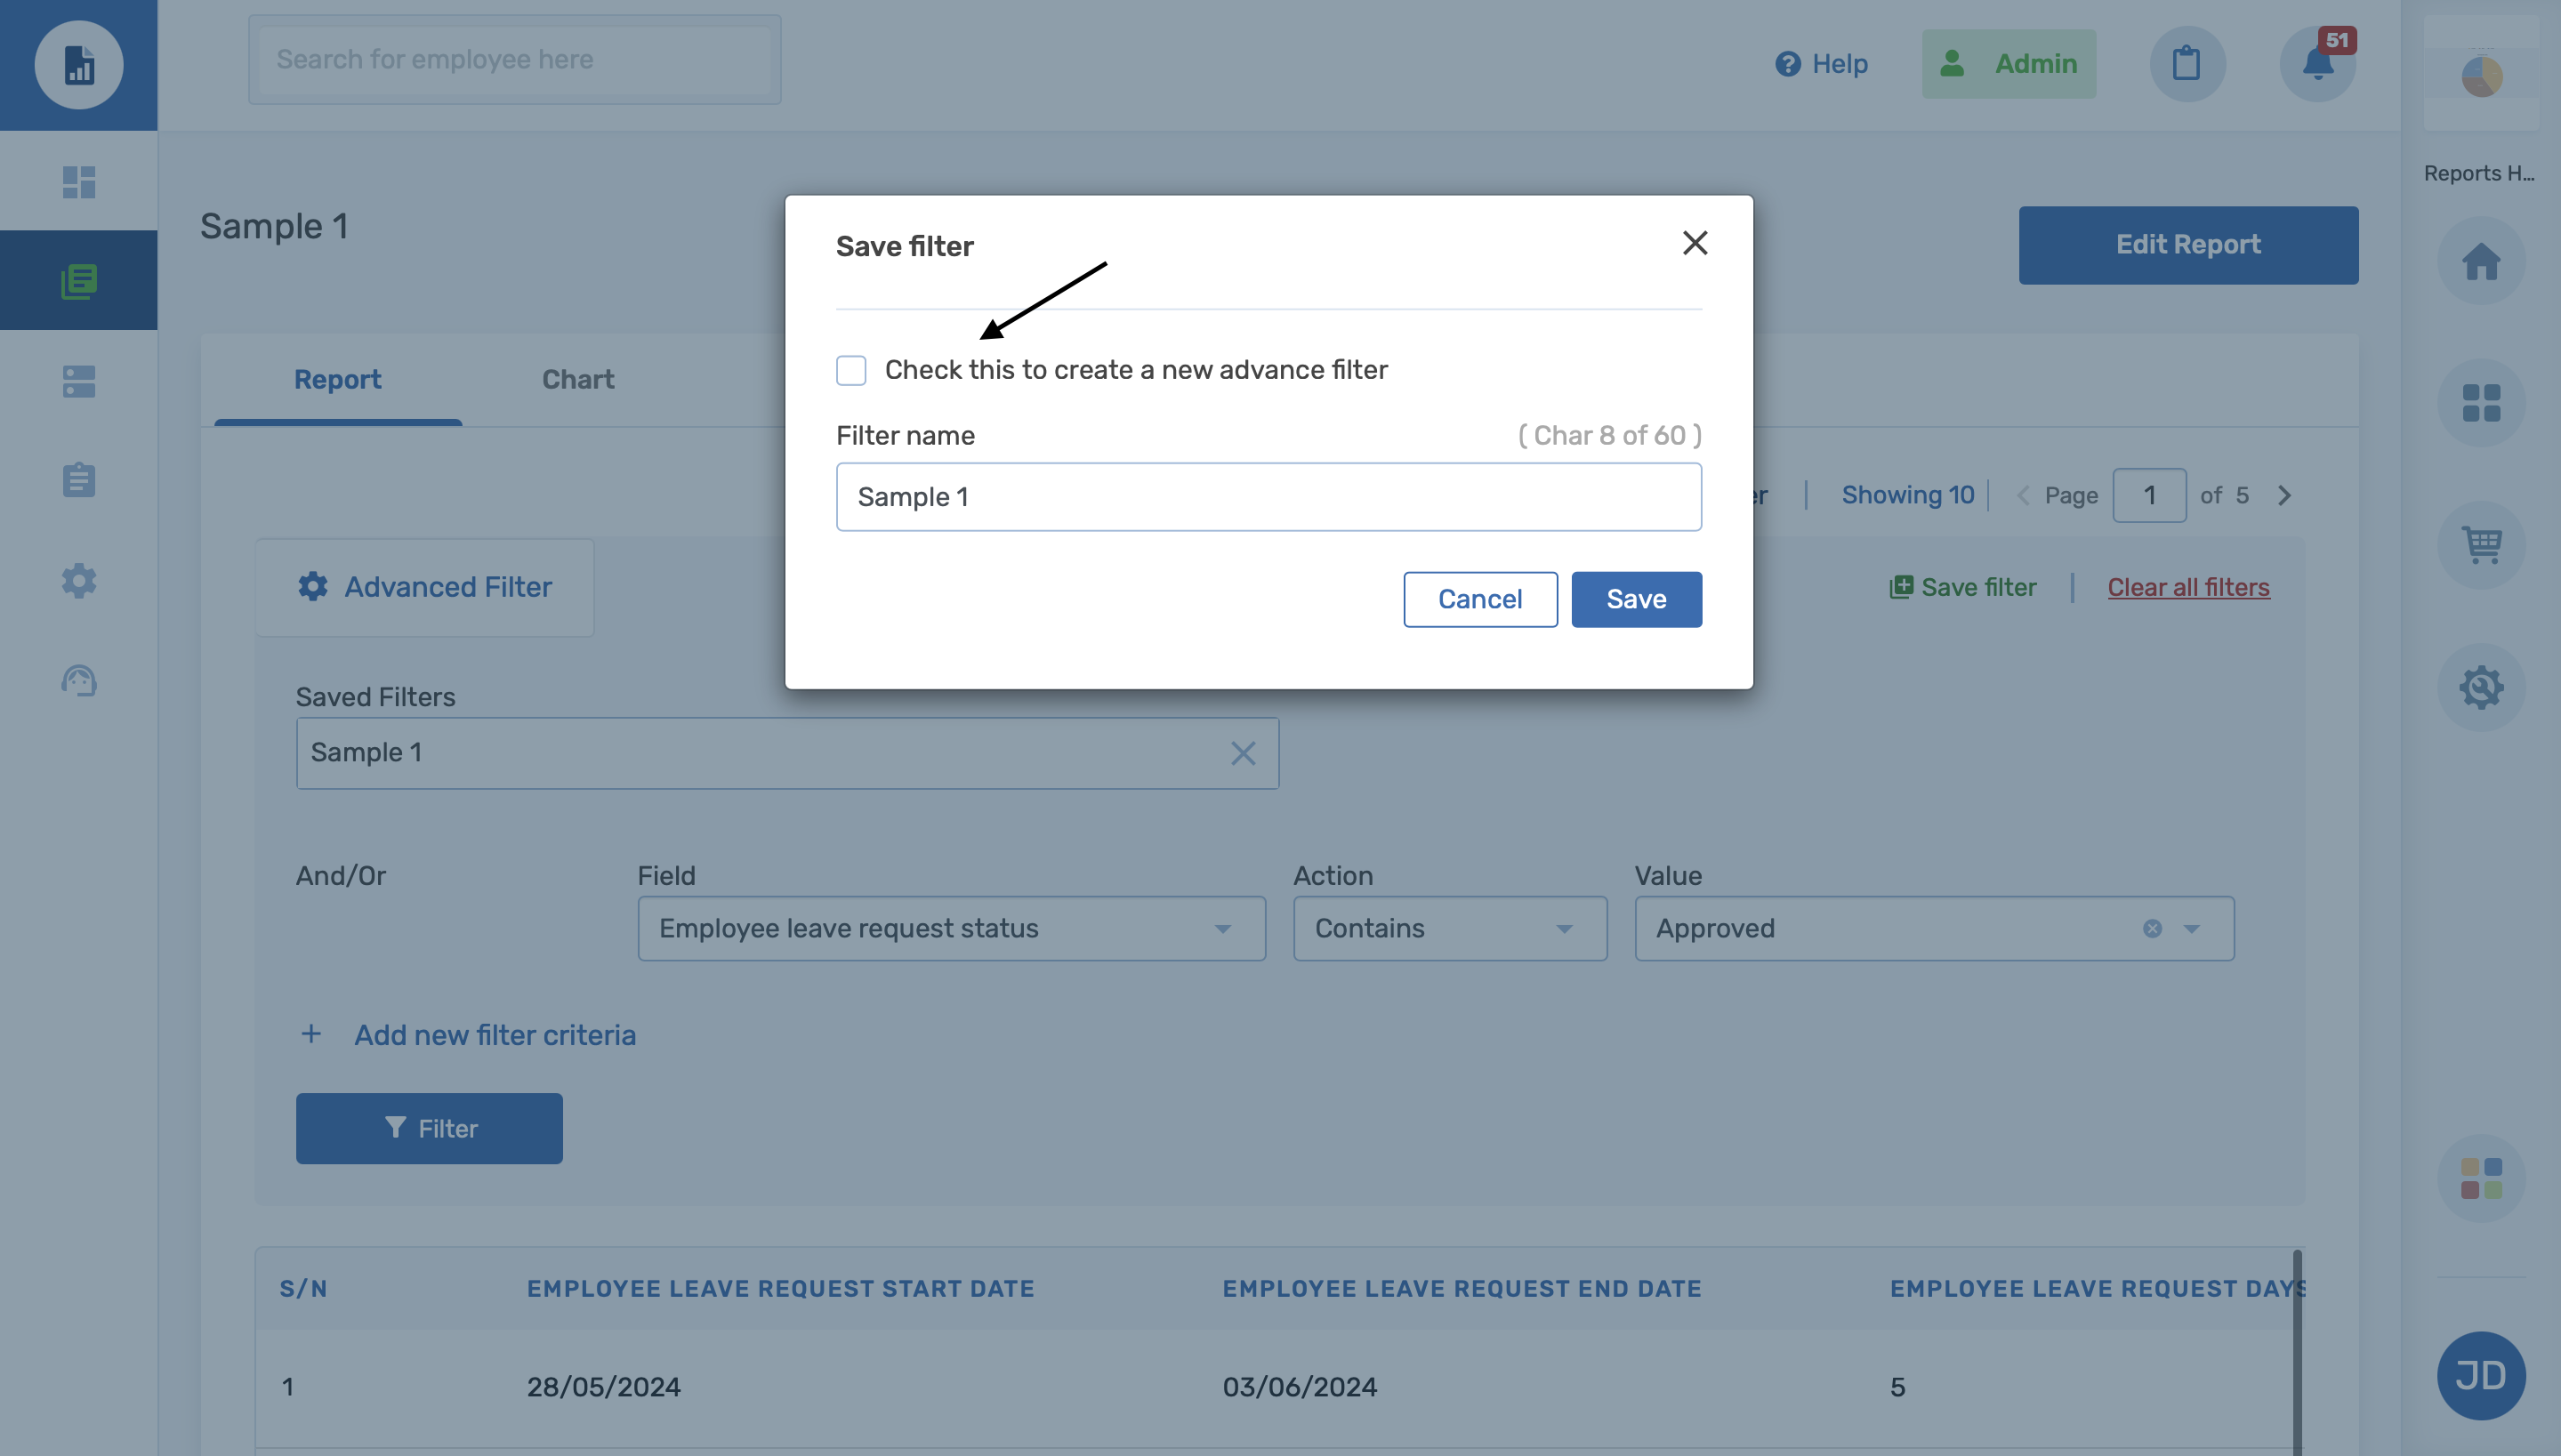
9. Once done with filtering the report, Click on Save report to save the filtered version. This allows admin to easily retrieve the saved filter settings later when editing the report.

10. The saved filters can be accessed by going to the report library and selecting "View" under the Actions column. This allows admins to view the filtered report
11. On the View page, users can use the saved filter feature to access previously saved report filters. By toggling the saved filter option and selecting a saved filter, the system will automatically display the corresponding report.

14.Schedule Report : When scheduling a report, users can apply a saved filter to customize the report content. After choosing the scheduling details, a dropdown labeled "Saved Filter" will appear, allowing users to select the specific filter they want to include in the scheduled report.

15. Sharing a report : When sharing a report, users can apply a saved filter to tailor the content before sending it. A "Saved Filter" dropdown will be displayed, allowing users to select the specific filter they want applied to the version being shared
