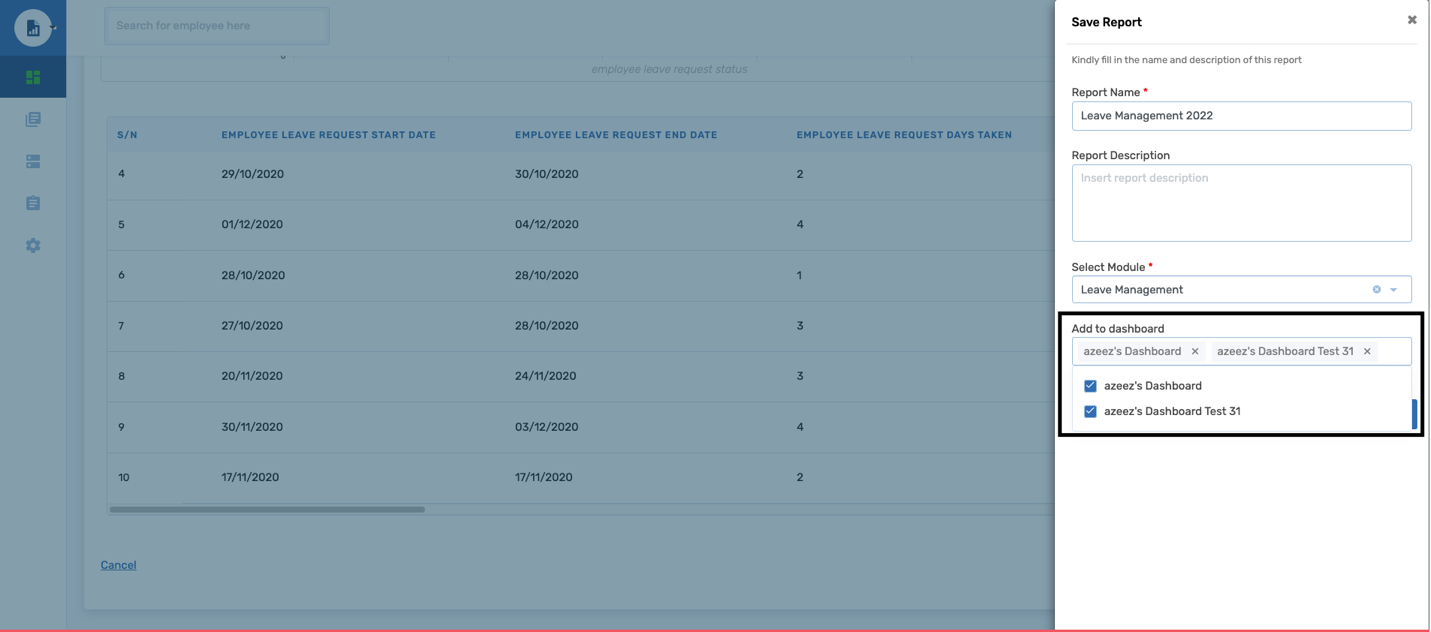
When a user is done with the data computation and configurations the user can save the report for future reference.
There are only 2 compulsory fields required when saving a report namely
- Report Name
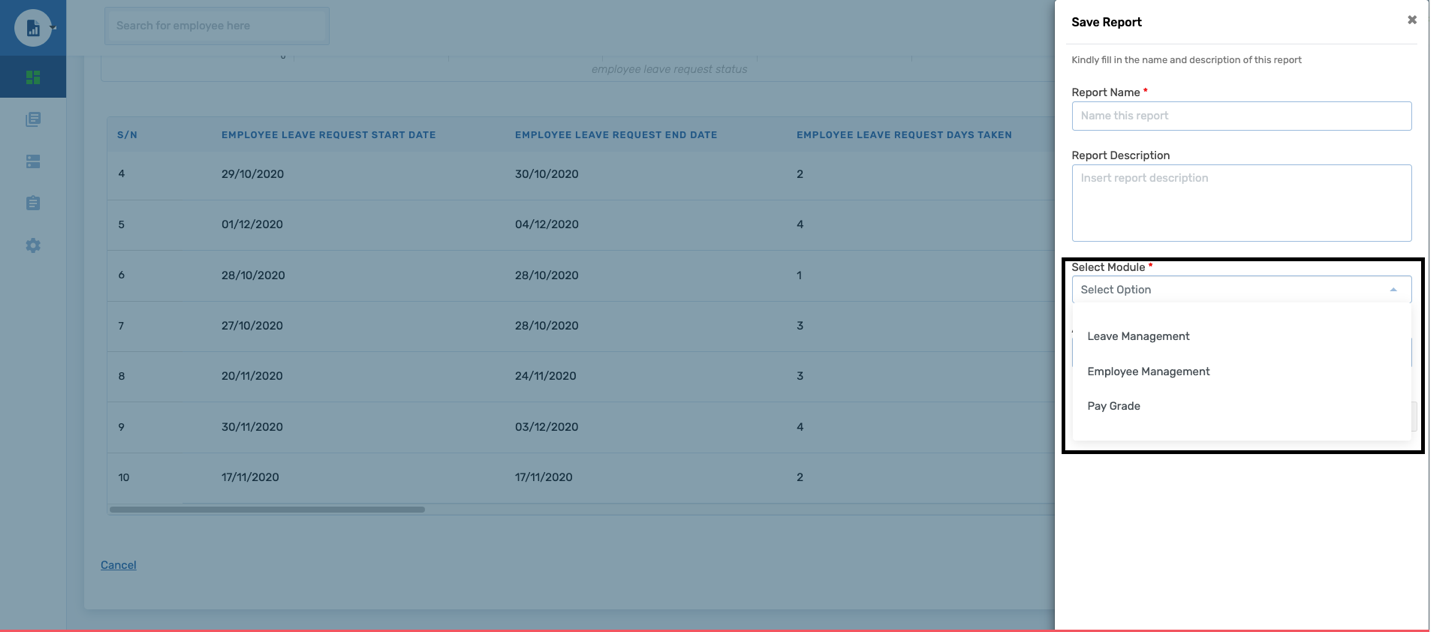
- Module library
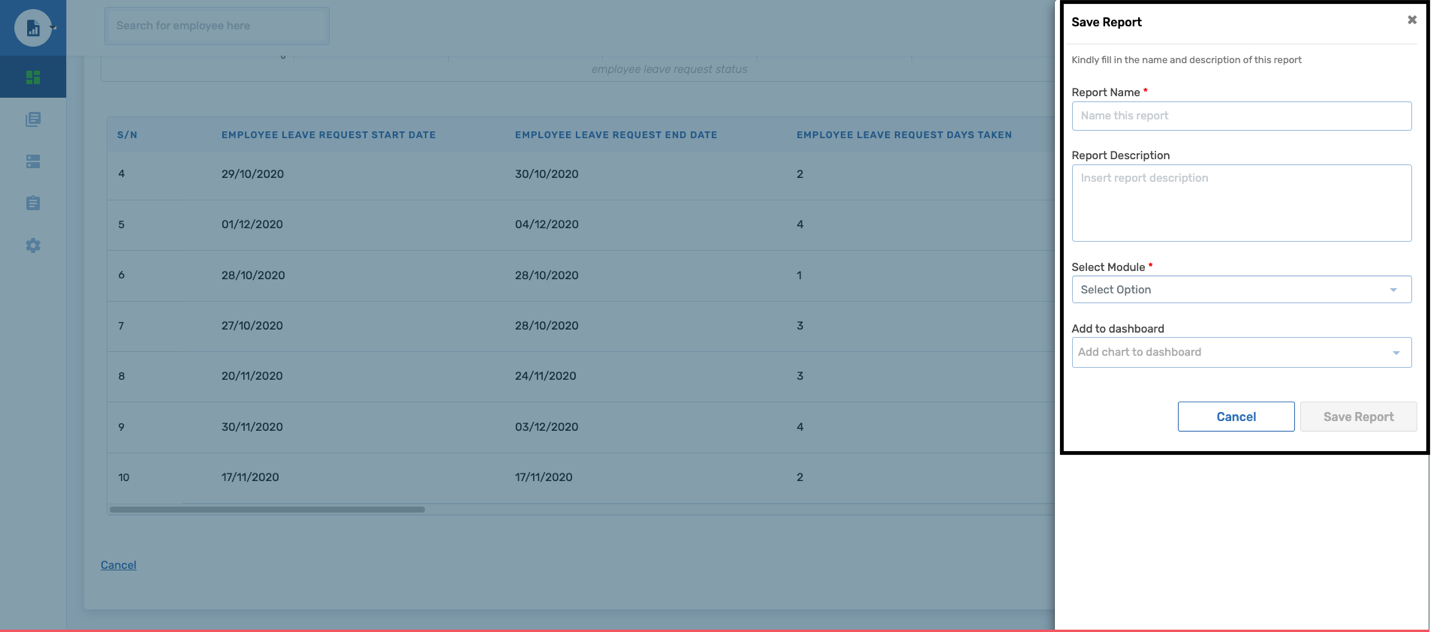
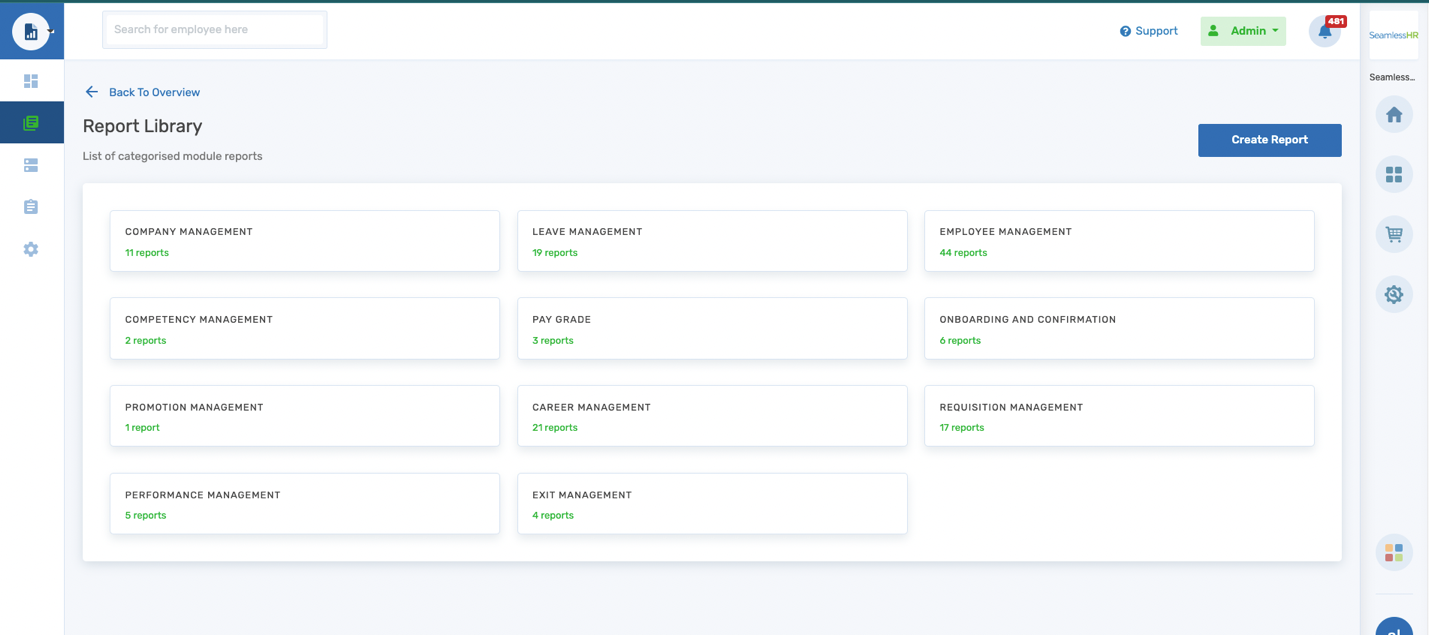
Selecting a report library: This is the location where the report would be saved. It is called a report library. The modules in the list are a representation of the selections made when building the report and the relationships the report “leave management” had with other modules.
Add to a dashboard: when a report is created with a chart. The user can choose to add a chart directly to one/more dashboard(s).
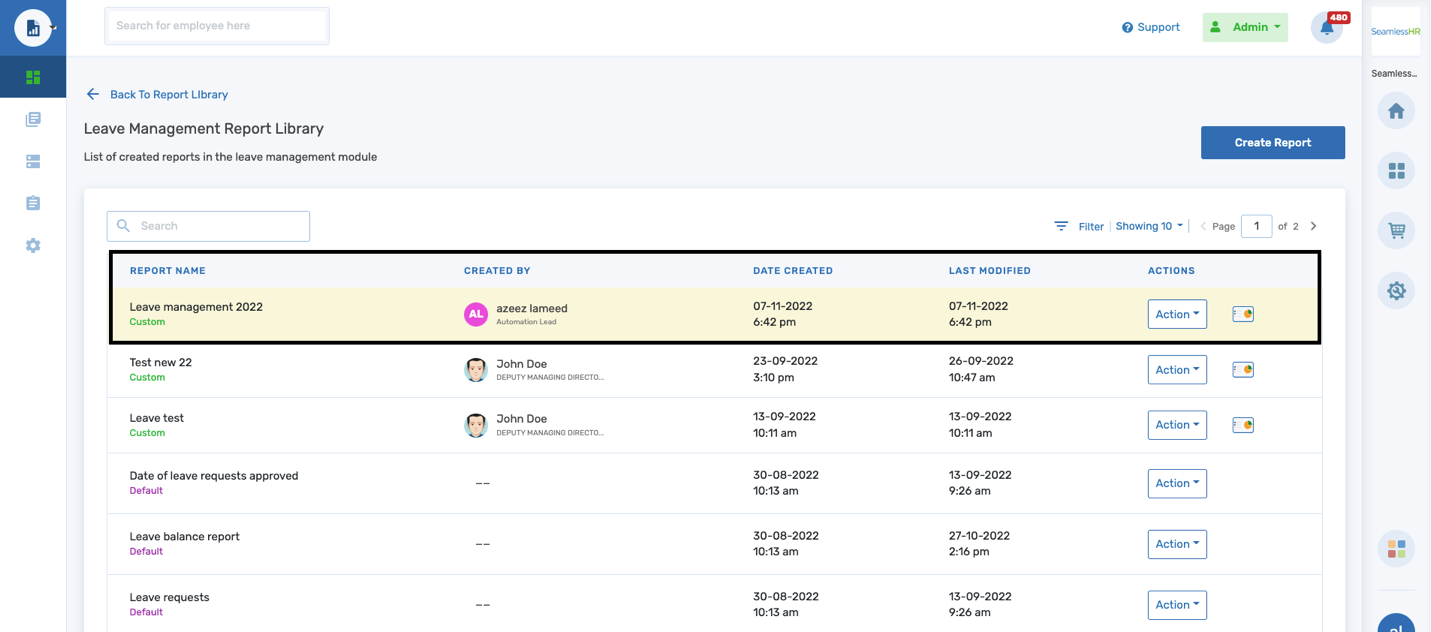
Saved Report: When a report is newly saved, the report is highlighted in yellow as seen below.
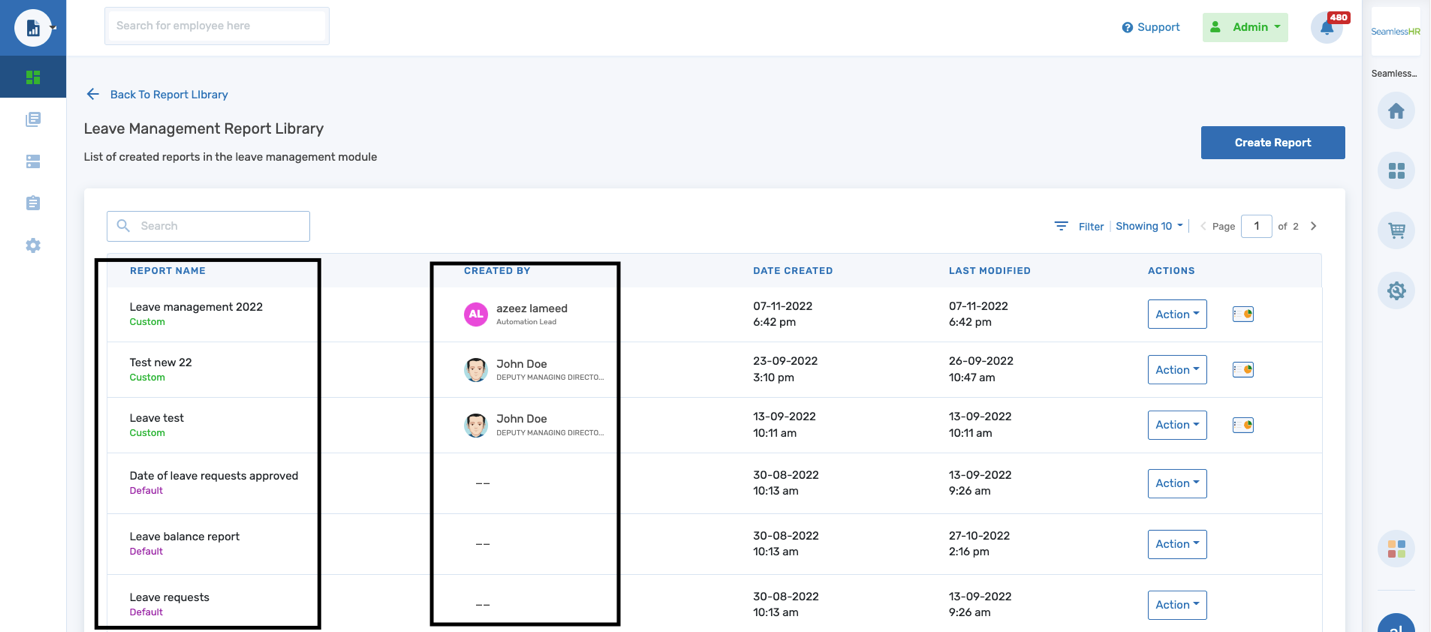
Actions in a report library: A user can perform the following actions within a report library.
- View report
- Filter report
- Duplicate report
- Schedule report
- Delete
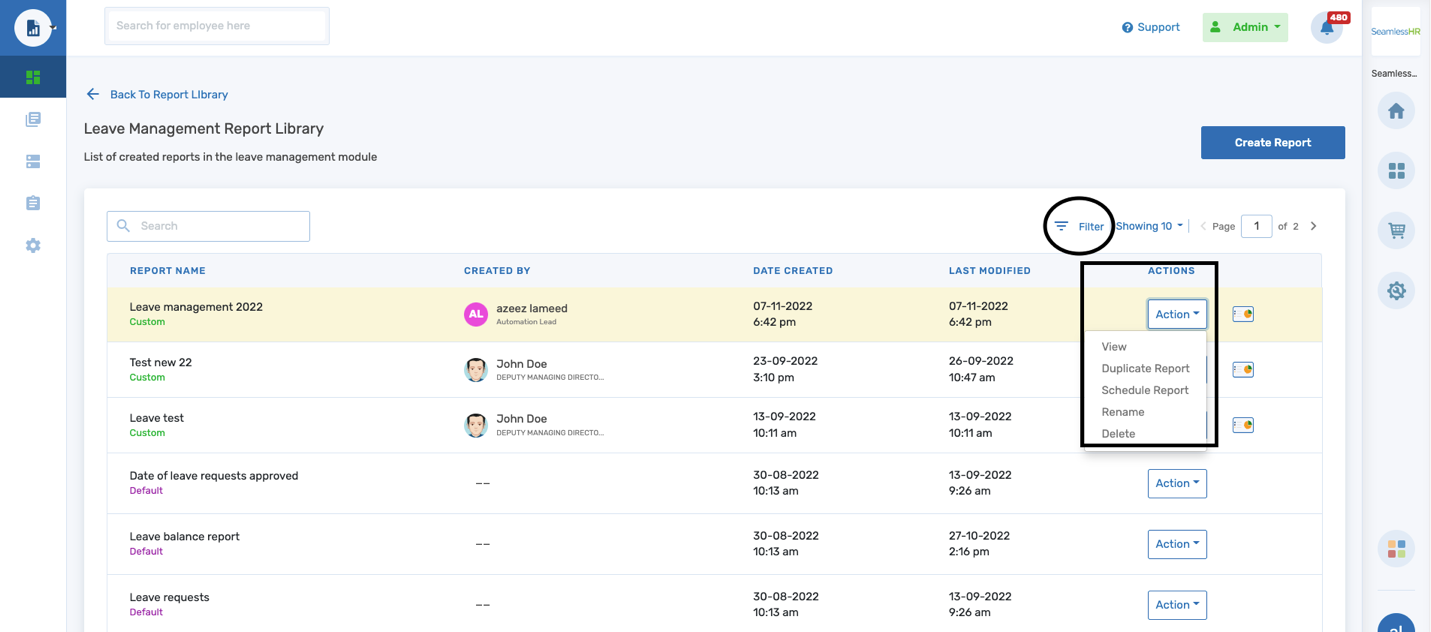
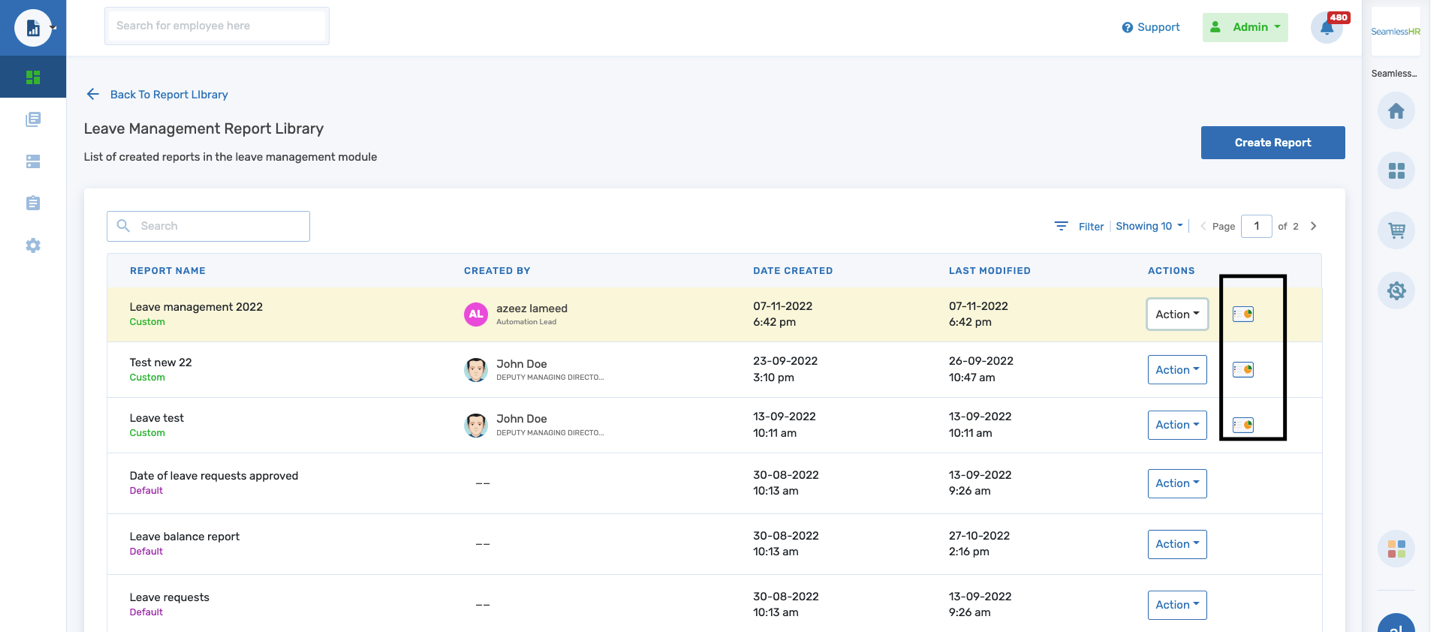
Chart Icon: When a report is created with a chart, the user can quickly identify the report by using the chart icon that would be appended to it. If a report does not contain a chart, there would be no chart icon appended to the report.
View Report: When a user views a report from the report library the user can toggle between tabs (Report or Chart) to view. Also, the user can export a report and chart.
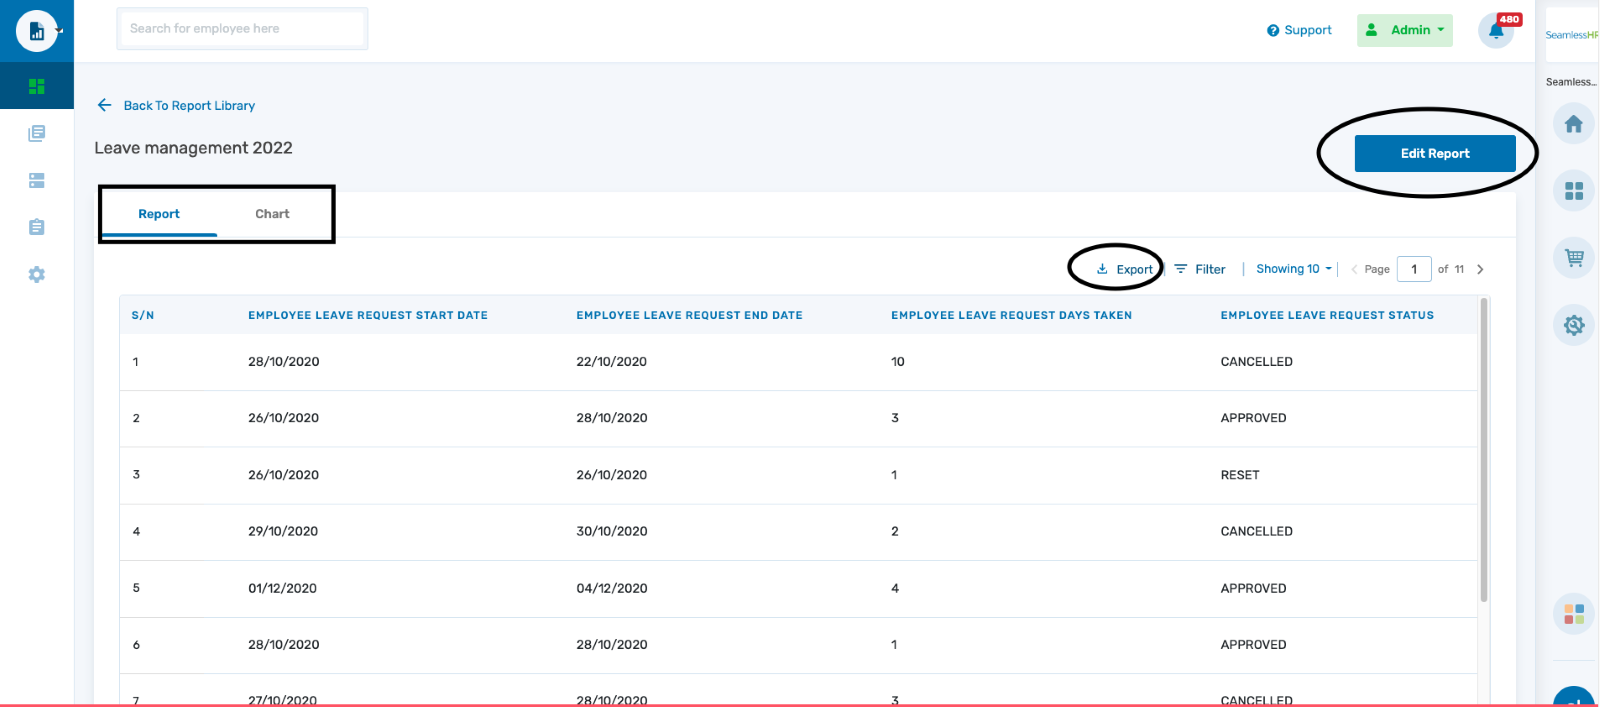
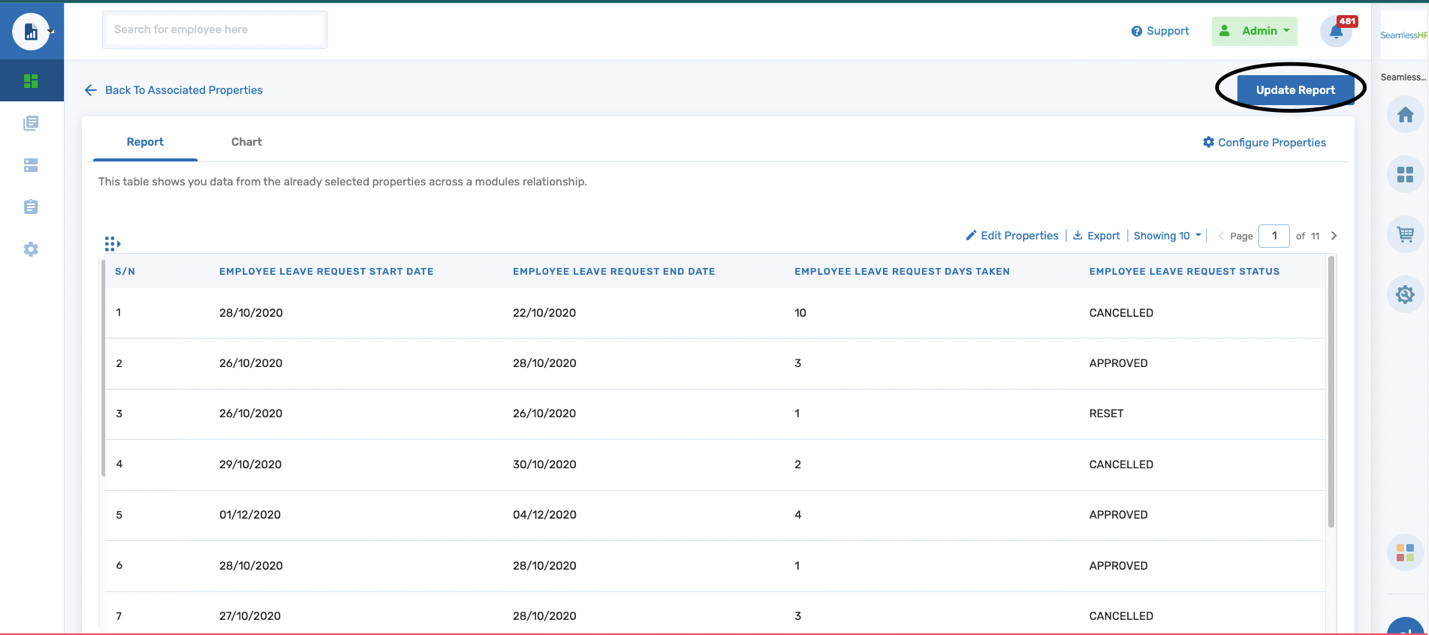
In a case where the user needs to adjust the report, he/she can select the “Edit report” button and the user is taken to the report table and can edit and alter the report and then update the report.
Report Types: There are 2 types of reports namely;
- Custom
- Default
A custom report reports the user creates and configured themselves while a default report is a system-generated report. Default reports do not have creators attached to them they are usually left blank.